

Peter age is 10

Friday, 29 March 2019
Spring 4 + Hibernate 4 + MySQL 8 + Maven Integration example using XML Configuration
🚀 Level Up Your Java Skills!
Subscribe to Ram N Java for easy-to-understand tutorials on Spring, Hibernate, and more!
CLICK HERE TO SUBSCRIBEMastering Spring 4 and Hibernate 4 Integration
Integrating powerful frameworks like Spring and Hibernate is a core skill for any Java developer. In this guide, we walk through a complete example of how to connect these frameworks using MySQL 8 and Maven with a classic XML-based configuration.
1. Why XML Configuration?
While annotations are popular, understanding XML configuration is essential for maintaining legacy systems and understanding how the "magic" happens behind the scenes. It provides a clear, centralized place to manage your beans and database settings.
2. The Role of Maven
Maven acts as your project manager. Instead of manually searching for JAR files, we define our dependencies in the pom.xml. This ensures that Spring, Hibernate, and the MySQL connector all work together seamlessly.
3. Setting Up MySQL 8
MySQL 8 introduced new security and performance features. We'll show you the exact properties you need in your configuration to ensure a stable connection between your Java application and the database.
Key Takeaways for Beginners:
- How to structure a Maven project.
- Defining DataSources and SessionFactories in XML.
- Performing basic CRUD operations.
Spring 4 + Hibernate 4 + MySQL 8 + Maven Integration example using Annotations Configuration
🚀 Master Java Development with Us!
Enjoyed this tutorial? Don't miss out on more deep dives into Spring and Hibernate.
SUBSCRIBE TO RAM N JAVASpring 4 and Hibernate 4 Integration Guide
Welcome! In this tutorial, we explore how to integrate Spring 4 with Hibernate 4 using MySQL 8 and Maven. This guide is perfect for beginners who want to understand how these technologies work together using modern annotation-based configurations.
1. Setting Up Your Database
First, we start with a simple Employee table. This table includes essential columns such as:
- ID: Unique identifier
- Name: Employee name
- Joining Date: When the employee started
- Salary: Compensation details
- SSN: Social Security Number for identification
2. Project Structure & Dependencies
Using Maven, we manage all necessary dependencies in the pom.xml file. A critical tip: Always ensure your MySQL Connector version is compatible with the MySQL server installed on your machine to avoid connection issues.
3. Configuration Classes
We move away from bulky XML files and use Java Annotations. We create a HibernateConfiguration class where we define:
- DataSource: Contains the URL, username, and password for your database.
- SessionFactory: Manages Hibernate sessions.
- TransactionManager: Handles database transactions smoothly.
4. Performing CRUD Operations
In the tutorial, we demonstrate how to perform the core database actions (CRUD):
- Create: Saving a new employee record.
- Read: Fetching all employees or searching by SSN.
- Update: Modifying existing data (like changing a salary).
- Delete: Removing records from the table.
Watch and Learn More
Check out these other helpful videos from Ram N Java to keep growing your skills:
Wednesday, 27 March 2019
Sunday, 24 March 2019
Spring hibernate integration - Playlist
Click the below link to watch on Youtube:
https://www.youtube.com/watch?v=mdijsNXZx0U&list=PLmCsXDGbJHdih0tSOCtCCw_KOi52HuqH6
Spring 3 + hibernate 3 + Maven integration example
🔥 Level Up Your Coding Skills!
Join thousands of developers on Ram N Java. Get the latest tutorials delivered to you!
SUBSCRIBE TO RAM N JAVAMastering Spring 3 and Hibernate 3 Integration
Are you looking to build robust Java applications? Integrating Spring 3 with Hibernate 3 is a classic yet powerful approach. In this comprehensive guide, we walk through a complete integration example using Maven to manage your dependencies.
Why Use Spring with Hibernate?
Spring provides excellent support for Hibernate by handling the boilerplate code. It manages the session factory, transaction management, and simplifies data access through the DAO pattern.
Key Components of the Project
In the video, we cover several critical areas for a successful setup:
- Maven Project Structure: How to organize your folders and source files.
- The pom.xml File: Adding dependencies for Spring Core, Spring ORM, Hibernate, and the MySQL Connector.
- Application Context: Configuring the DataSource, SessionFactory, and Transaction Manager in XML.
- Entity Mapping: Mapping your Java classes to database tables using Hibernate XML mappings.
Step-by-Step Implementation
We start by creating a simple Employee model. From there, we build the DAO (Data Access Object) layer to handle database interaction. You will see how the HibernateTemplate or SessionFactory makes database queries clean and efficient.
Check Out These Other Videos
Enjoyed this tutorial? You might also find these videos from my channel helpful:
Sunday, 17 March 2019
How to remove the Observer from the Observable in Java? | Observer and O...
Want to Master Java Design Patterns?
Subscribe to Ram N Java for clean code, architecture patterns, and practical Java tutorials!
Subscribe on YouTubeManaging Observers in Java's Observable Class
In event-driven architectures and the Observer Design Pattern, registering observers is only half the picture. To avoid memory leaks, unwanted event handling, and redundant notifications, applications must have clean mechanisms to unregister or unsubscribe observers when they are no longer needed.
Java's built-in java.util.Observable provides two primary methods to detach listeners:
deleteObserver(Observer o): Removes a specific observer from the internal observer list.deleteObservers(): Clears and unregisters all active observers in a single operation.
How deleteObserver and deleteObservers Work
Consider an e-commerce price alert model where customer observers (such as PeterObserver and JohnObserver) listen for price changes on a product like NokiaMobilePriceObservable:
- Initial State: Both observers are registered using
addObserver(). CallingcountObservers()returns2. When the price changes, both receive notifications. - Removing a Single Observer: Calling
deleteObserver(peterObserver)unregisters Peter. The count drops to1, and subsequent price modifications will notify only John. - Removing All Observers: Calling
deleteObservers()cleans up all remaining registrations, dropping the active count to0. No further notifications are dispatched.
Why Observer Deregistration Matters
- Prevents Memory Leaks: Known as the "lapsed listener" problem, keeping lingering references inside subjects prevents garbage collection of unused observer objects.
- Optimizes Performance: Eliminates processing overhead by ensuring notifications are dispatched only to components actively listening.
- Dynamic Lifecycle Control: Gives clients complete runtime authority over when to subscribe or unsubscribe from subject notifications.
Related Observer Pattern Tutorials to Watch Next
Example of Observer and Observable in Java? | Observer and Observable
Want to Master Java Design Patterns?
Subscribe to Ram N Java for clean code, architecture patterns, and practical Java tutorials!
Subscribe on YouTubeReal-Time Example: Mobile Price Tracking Alert System
The Observer Design Pattern is widely applied in real-time notification systems, such as e-commerce price alerts, stock market updates, and live score trackers. In Java, this pattern can be implemented directly using the built-in java.util.Observer interface and java.util.Observable class.
In this scenario, a mobile phone's price changes dynamically, and multiple registered customers (observers) need to be instantly informed whenever an update occurs.
Core Participants in the Application
-
NokiaMobilePriceObservable (Subject/Observable): Extends
Observable. It maintains the product price attribute and dispatches updates usingsetChanged()andnotifyObservers(). -
JohnObserver & PeterObserver (Concrete Observers): Implement the
Observerinterface and override theupdate(Observable o, Object arg)method to react to price revisions. - ObservableDemo (Driver Class): Registers the observers with the observable and simulates changing the product price to trigger notifications.
Step-by-Step Implementation Flow
-
Define Observers: Create classes like
JohnObserverandPeterObserverimplementingjava.util.Observerto receive and print notifications whenupdate()is invoked. -
Create the Observable: Subclass
java.util.Observableto createNokiaMobilePriceObservable. WhensetPrice()is called, flag the change withsetChanged()and notify listeners vianotifyObservers(). -
Subscribe & Trigger: In the client code, instantiate the mobile observable with an initial price, attach both observers using
addObserver(), and update the price to observe automatic event delivery.
Why Use Observer and Observable?
- Loose Coupling: The observable subject does not need to know the internal implementation details of John or Peter; it only interacts via the standard
Observerinterface. - Broadcasting Capabilities: Supports one-to-many communication, allowing any number of interested observers to subscribe or unsubscribe at runtime.
- Clean Event Architecture: Eliminates continuous polling by letting the subject automatically push data updates as soon as state changes happen.
Related Observer Pattern Tutorials to Watch Next
What is the Observer and Observable in Java? | Observer and Observable - Playlist
Click the below link to watch on Youtube:
https://www.youtube.com/watch?v=o_Xbi8ZmkE8&list=PLmCsXDGbJHdh9VYKrQGTvM0wo2h8j3nzD
What is the Observer and Observable in Java? | Observer and Observable
Want to Master Java Design Patterns?
Subscribe to Ram N Java for clean code, architecture patterns, and practical Java tutorials!
Subscribe on YouTubeWhat Are Observer and Observable in Java?
In software design, keeping dependent objects synchronized when a core data model changes is a common requirement. In Java, this is directly supported via the built-in classes in the java.util package:
java.util.Observable(Class): Represents the subject or model being observed. It maintains an internal list of observers and notifies them whenever its state changes.java.util.Observer(Interface): Implemented by any class that wants to be informed of state changes occurring in anObservableobject.
This mechanism forms the backbone of the classic Model-View paradigm and the Observer Design Pattern, decoupling state management from event listeners.
How the Notification Workflow Works
-
Observer Registration: Observers implement the
Observerinterface and itsupdate(Observable o, Object arg)method. They register with the observable instance usingaddObserver(Observer o). -
State Modification: When internal state changes (e.g., product price updates), the observable invokes
setChanged()to flag that a state modification occurred. -
Automatic Broadcasting: The observable calls
notifyObservers(), which loops through all registered observers and triggers each observer'supdate()method automatically.
Key Architectural Benefits
- Loose Coupling: The subject only interacts with listeners through the generic
Observerinterface without caring about their concrete classes. - One-to-Many Communication: Easily supports multiple independent listeners receiving simultaneous updates.
- Event-Driven Design: Replaces continuous polling with immediate, event-triggered updates.
Related Observer Pattern Tutorials to Watch Next
Sunday, 10 March 2019
Spring - How to get all records by calling the stored procedure using SimpleJdbcCall
🚀 Want to Master Spring & Java Development?
Subscribe to Ram N Java for beginner-friendly coding tutorials and practical guides!
🔔 Subscribe to YouTube ChannelRetrieve All Records from Stored Procedures Using SimpleJdbcCall
Stored procedures in relational databases are often used not just to perform updates or compute single output values, but to return entire result sets. In Spring JDBC, SimpleJdbcCall provides an elegant, multi-threaded mechanism to call stored procedures and map returned rows directly into domain objects or lists using RowMapper.
1. Returning ResultSets from Stored Procedures
When a database stored procedure executes a SELECT query, it opens a cursor or returns a ResultSet:
- Database Encapsulation: Complex join queries or business filtering logic remain encapsulated inside the database procedure.
- Automatic ResultSet Binding: Spring's
SimpleJdbcCallintercepts the returned cursor and binds it directly to Java objects without manual iteration over JDBC result sets. - Thread Safety: Like other Spring JDBC template classes, a configured
SimpleJdbcCallis thread-safe and can be reused concurrently across multiple requests.
2. Configuring returningResultSet with RowMapper
To map multiple returned rows to Java objects, configure returningResultSet on your SimpleJdbcCall instance:
- Specify Procedure Name: Call
withProcedureName("procedure_name")to identify the target stored procedure. - Bind ResultSet to RowMapper: Use
returningResultSet("resultSetKey", new BeanPropertyRowMapper<>(TargetClass.class))or supply a customRowMapperimplementation. - Zero Boilerplate: Spring automatically handles column-to-property conversion, connection management, and resource cleanup.
3. Executing the Call and Extracting the Record List
Executing the procedure and accessing your records takes only a couple of lines:
- Execute the Call: Call
simpleJdbcCall.execute()(or pass aMapSqlParameterSourceif the procedure accepts filter parameters). - Extract the List: Access the returned
Map<String, Object>using the key specified inreturningResultSet. - Typed List Result: Cast the map entry directly to
List<TargetClass>to obtain the complete record collection ready for use in your application.
4. Practical Summary & Best Practices
Key tips for production environments:
- Always configure the
SimpleJdbcCallinstance during DAO initialization or bean definition rather than inside method calls. - Use
BeanPropertyRowMapperfor quick POJO mapping when column names match Java property names (camelCase to snake_case).
📺 Explore More Spring JDBC Tutorials
Continue expanding your Java and Spring knowledge with these related tutorials from our channel:
Spring - Calling a stored function using SimpleJdbcCall | Spring JDBC tutorial | Spring JDBC
🚀 Want to Master Spring & Java Development?
Subscribe to Ram N Java for beginner-friendly coding tutorials and practical guides!
🔔 Subscribe to YouTube ChannelCalling Stored Functions with SimpleJdbcCall in Spring JDBC
In addition to calling stored procedures, Spring JDBC's SimpleJdbcCall provides seamless support for executing database stored functions. Unlike stored procedures which return values through output parameters or result sets, stored functions compute and return a single scalar value directly. With SimpleJdbcCall, invoking stored functions requires minimal setup and zero SQL boilerplate.
1. Procedures vs. Functions in SimpleJdbcCall
While both are database routines, stored functions have specific differences:
- Direct Return Value: Stored functions return an explicit scalar value via a
RETURNstatement rather than through output parameters. - Configuration Method: Instead of
withProcedureName(...), you configurewithFunctionName(...)on yourSimpleJdbcCallinstance. - Single-Value Execution: Using
executeFunction(...)allows you to directly retrieve the typed return value without extracting it from a map.
2. Configuring SimpleJdbcCall for Stored Functions
Setting up SimpleJdbcCall to target a database function is clean and intuitive:
- Initialize with DataSource: Instantiate
SimpleJdbcCallby injecting your configuredDataSourceorJdbcTemplatebean. - Specify the Function Name: Call
withFunctionName("function_name")to indicate the target function routine. - Compile Once: Configure the call instance once inside your DAO bean or repository constructor to ensure thread-safe reuse.
3. Executing the Function and Retrieving Results
Invoking the database function takes only a couple of lines:
- Supply Input Parameters: Use
MapSqlParameterSourceto pass arguments corresponding to the function's parameter signature. - Execute with Return Type: Call
simpleJdbcCall.executeFunction(ReturnType.class, paramSource), specifying the expected return type (such asString.class,Integer.class, orDouble.class). - Direct Value Access: The method returns the typed result directly, eliminating manual casting.
4. Key Advantages
Utilizing SimpleJdbcCall for database functions provides significant benefits:
- Type Safety: Direct mapping into target Java wrapper classes eliminates casting bugs.
- Zero Boilerplate: No need for manual
CallableStatementsetups or raw SQL syntax like{? = call function_name(?)}. - Metadata Awareness: Automatically resolves parameter bindings and types directly from the database schema.
📺 Explore More Spring JDBC Tutorials
Continue expanding your Java and Spring knowledge with these related tutorials from our channel:
Spring - Calling a stored procedure with SimpleJdbcCall (Explicitly declaring parameters)
🚀 Want to Master Spring & Java Development?
Subscribe to Ram N Java for beginner-friendly coding tutorials and practical guides!
🔔 Subscribe to YouTube ChannelCalling Stored Procedures with Explicit Parameters Using SimpleJdbcCall
While Spring JDBC’s SimpleJdbcCall is capable of discovering stored procedure parameters automatically via database metadata, certain databases or driver configurations restrict metadata access. In enterprise production environments, explicitly declaring parameters using declareParameters(...) provides fine-grained control, optimal performance, and deterministic parameter mapping.
1. Why Declare Parameters Explicitly?
Defining parameters explicitly offers key structural and architectural benefits:
- Avoid Database Metadata Lookups: Bypasses catalog queries at startup, which speeds up initialization and works even when database user permissions restrict metadata visibility.
- Precise SQL Type Mapping: Explicitly defines SQL types (such as
Types.VARCHARorTypes.INTEGER) for both input and output parameters. - Consistent Cross-Platform Execution: Ensures predictable behavior across different database engines like MySQL, Oracle, PostgreSQL, and SQL Server.
2. Using declareParameters with SqlParameter & SqlOutParameter
Spring provides specialized parameter classes to declare procedure signatures clearly:
- SqlParameter: Used to define an
INparameter, specifying its name and standard JDBC type fromjava.sql.Types. - SqlOutParameter: Used to declare an
OUTparameter that captures return values from the procedure. - SqlInOutParameter: Used when a parameter supplies an initial value and receives a modified output upon execution.
3. Executing the Procedure and Handling Output
Once configured, executing the stored procedure and parsing output takes minimal effort:
- Bind Values: Use
MapSqlParameterSourceto provide values corresponding to each declaredSqlParameter. - Run Execute: Call
simpleJdbcCall.execute(parameters)to invoke the database routine. - Extract Results: The returned
Map<String, Object>contains values mapped by the exact names specified in yourSqlOutParameterdeclarations.
4. Practical Summary & Best Practices
For critical enterprise applications:
- Combine
withoutProcedureColumnMetaDataAccess()withdeclareParameters(...)when connecting to locked-down production databases. - Initialize and configure the
SimpleJdbcCallinstance once inside your DAO bean for thread-safe concurrent execution.
📺 Explore More Spring JDBC Tutorials
Continue expanding your Java and Spring knowledge with these related tutorials from our channel:
Spring - Calling a stored procedure with SimpleJdbcCall | Spring JDBC tutorial
🚀 Want to Master Spring & Java Development?
Subscribe to Ram N Java for beginner-friendly coding tutorials and practical guides!
🔔 Subscribe to YouTube ChannelCalling Stored Procedures with SimpleJdbcCall in Spring JDBC
Executing database stored procedures in standard JDBC traditionally involves configuring verbose CallableStatement instances, registering OUT parameters manually, and handling raw SQL strings. Spring JDBC provides SimpleJdbcCall, a multi-threaded, metadata-aware class designed to simplify calling stored procedures and database functions with minimal configuration.
1. What is SimpleJdbcCall?
SimpleJdbcCall is part of the org.springframework.jdbc.core.simple package. It automatically reads database metadata to inspect parameter names, types, and directions (IN, OUT, and INOUT):
- Automatic Parameter Detection: Discovers procedure signature parameters from the database catalog, reducing manual registration.
- Zero Boilerplate: Eliminates explicit SQL execution queries like
{call procedure_name(?, ?)}. - Result Mapping: Easily captures returned scalar values, output parameter maps, or multiple
ResultSetrows using RowMappers.
2. How to Configure SimpleJdbcCall
To set up SimpleJdbcCall inside your DAO or repository layer:
- Instantiate with DataSource or JdbcTemplate: Initialize the instance by passing your configured
DataSourceorJdbcTemplatebean. - Declare the Procedure Name: Call
withProcedureName("procedure_name")to specify the target procedure. - Register Out Parameters (Optional): If the database metadata does not supply return definitions, declare parameters explicitly with
declareParameters(...). - Compile the Call: The configuration compiles automatically on the first call, making subsequent invocations fast and thread-safe.
3. Passing IN Parameters and Retrieving OUT Results
Invoking the procedure and obtaining results is straightforward:
- Supplying Parameters: Use
MapSqlParameterSourceto addINparameters by chaining.addValue("paramName", value). - Executing the Call: Call
simpleJdbcCall.execute(paramSource), which returns aMap<String, Object>containing allOUTparameter values indexed by parameter name. - Accessing Outputs: Retrieve values cleanly from the map using the corresponding output parameter name key.
4. Key Advantages
Using SimpleJdbcCall provides significant improvements over low-level JDBC approaches:
- Cleaner DAO Layer: Cuts out dozens of lines of repetitive setup code.
- Thread Safety: Configure once during bean initialization and safely reuse across multiple concurrent requests.
- Fewer Runtime Bugs: Eliminates mismatched index positions and incorrect SQL type registrations.
📺 Explore More Spring JDBC Tutorials
Continue expanding your Java and Spring knowledge with these related tutorials from our channel:
Spring - Inserting data using SimpleJdbcInsert and MapSqlParameterSource | Spring JDBC tutorial
🚀 Want to Master Spring & Java Development?
Subscribe to Ram N Java for beginner-friendly coding tutorials and practical guides!
🔔 Subscribe to YouTube ChannelEfficient Data Insertion: SimpleJdbcInsert with MapSqlParameterSource
In Spring JDBC, SimpleJdbcInsert streamlines database write operations by reading table metadata directly and eliminating the need for boilerplate INSERT INTO SQL statements. When coupled with MapSqlParameterSource, mapping input parameters becomes structured, highly readable, and type-safe.
1. Why Use MapSqlParameterSource?
While SimpleJdbcInsert can accept standard Java Map objects, MapSqlParameterSource provides key benefits tailored for JDBC operations:
- Fluent Method Chaining: Add multiple parameters cleanly using chained
.addValue("columnName", value)calls. - Explicit SQL Type Specification: Supports explicit SQL types (e.g.,
Types.VARCHAR,Types.INTEGER) when insertingnullor custom values. - Spring-Native Integration: Implements the
SqlParameterSourceinterface natively, allowing seamless interoperability across Spring JDBC components.
2. Setting Up SimpleJdbcInsert
Configuring SimpleJdbcInsert in your data access layer is quick and clean:
- Instantiate with DataSource: Initialize the instance by passing your configured
DataSourcebean. - Set Table Name: Use
withTableName("table_name")to specify the target database table. - Restrict Columns (Optional): Optionally define specific columns using
usingColumns(...)to let database defaults handle the rest. - Generated Keys: Use
usingGeneratedKeyColumns(...)if your table features auto-increment primary keys.
3. Executing Inserts with MapSqlParameterSource
Executing the insert takes just two concise steps:
- Build the Parameters: Instantiate
new MapSqlParameterSource()and chain.addValue("column", value)for each database field. - Execute the Statement: Call
simpleJdbcInsert.execute(paramSource)orexecuteAndReturnKey(paramSource)to run the insert and retrieve generated identifiers.
4. Key Takeaways
Using MapSqlParameterSource with SimpleJdbcInsert prevents common syntax mistakes, eliminates positional parameter bugs, and keeps your DAO implementation concise and easy to maintain.
📺 Explore More Spring JDBC Tutorials
Continue expanding your Java and Spring knowledge with these related tutorials from our channel:
Spring - Inserting data using SimpleJdbcInsert and SqlParameterSource | Spring JDBC tutorial
🚀 Want to Master Spring & Java Development?
Subscribe to Ram N Java for beginner-friendly coding tutorials and practical guides!
🔔 Subscribe to YouTube ChannelInserting Data with SimpleJdbcInsert and SqlParameterSource
When working with database persistence in Spring applications, SimpleJdbcInsert provides a clean way to insert records without writing repetitive SQL queries. Pairing it with the SqlParameterSource interface makes parameter binding structured, type-safe, and effortless.
1. What is SqlParameterSource?
In Spring JDBC, SqlParameterSource is an interface designed to provide named parameter values for SQL operations. Instead of manually putting entries into a standard Java Map, it provides structured mechanisms to supply parameter values:
- MapSqlParameterSource: A flexible implementation that allows chaining parameter name-value pairs fluently via
.addValue(). - BeanPropertySqlParameterSource: Directly binds properties from a Java Bean or POJO to database column names using reflection.
- Type Safety: Provides better support for explicit SQL type mapping when inserting custom or nullable types.
2. Using MapSqlParameterSource with SimpleJdbcInsert
MapSqlParameterSource is ideal when inserting dynamic data or when your data fields do not directly map to a single entity object:
- Fluently Add Values: Use
new MapSqlParameterSource().addValue("columnName", value)to map database fields. - Direct Execution: Pass the parameter source instance directly into
simpleJdbcInsert.execute(parameters). - Cleaner Syntax: Avoids manual hash map instantiations and repetitive
put()calls.
3. Simplifying POJO Inserts with BeanPropertySqlParameterSource
If you already have a domain object (such as an Employee or User bean):
- Wrap the bean with
new BeanPropertySqlParameterSource(myBean). - Spring automatically extracts getter properties and aligns them with matching table column names.
- Minimizes boilerplate code and makes domain-driven persistence seamless.
4. Key Advantages
Combining SimpleJdbcInsert with SqlParameterSource gives you:
- Zero Boilerplate SQL: No need to craft explicit
INSERT INTOstatements. - Less Human Error: Reduces typo risks associated with positional parameter placeholders (
?). - Enhanced Maintainability: Code is cleaner, concise, and easier to test across enterprise data layers.
📺 Explore More Spring JDBC Tutorials
Continue expanding your Java and Spring knowledge with these related tutorials from our channel:
Wednesday, 6 March 2019
Spring - Specifying columns for SimpleJdbcInsert | Spring JDBC tutorial | Spring JDBC
🚀 Want to Master Spring & Java Development?
Subscribe to Ram N Java for beginner-friendly coding tutorials and practical guides!
🔔 Subscribe to YouTube ChannelSpecifying Columns with SimpleJdbcInsert in Spring JDBC
While Spring JDBC’s SimpleJdbcInsert can automatically read all table columns through database metadata, real-world database design often requires inserting data only into selected columns. By explicitly configuring target columns with usingColumns(...), you gain precise control over your SQL insert statements while skipping default or auto-managed columns.
1. Why Restrict Columns with usingColumns()?
Explicitly declaring the columns for an insert operation provides key technical advantages:
- Database Defaults: Allows the database to assign predefined default values (such as timestamps or UUIDs) to columns you choose to omit.
- Improved Performance: Restricts metadata retrieval and query preparation strictly to the specified fields.
- Prevent Unwanted Overwrites: Guarantees that unassigned entity properties do not accidentally push
NULLinto columns meant to retain system defaults.
2. Configuring usingColumns in SimpleJdbcInsert
Setting up usingColumns is straightforward and chains fluently with other configuration methods during initialization:
- Define the Table Name: Use
withTableName("table_name")to specify the target database table. - Chain usingColumns: Call
usingColumns("col1", "col2", "col3")with the specific column names to be included in the generatedINSERTquery. - Thread Safety: Configure the
SimpleJdbcInsertinstance once during DAO initialization or bean creation so it remains thread-safe for all incoming requests.
3. Passing Parameters to the Operation
Once configured, you can execute the insert using Spring’s standard parameter mapping utilities:
- MapSqlParameterSource: Provide named parameters via key-value chaining matching the specified column names.
- BeanPropertySqlParameterSource: Pass a domain POJO; Spring matches getter method names directly to your declared columns.
- Map<String, Object>: Use a standard Java map to dynamically supply values at runtime.
4. Practical Summary & Best Practices
Whenever a database table contains auto-generated IDs, audit timestamps, or default trigger columns, explicitly specifying columns with usingColumns(...) ensures clean, error-free inserts without generating manual SQL statements.
📺 Explore More Spring JDBC Tutorials
Continue expanding your Java and Spring knowledge with these related tutorials from our channel:
Spring - Inserting data using SimpleJdbcInsert | Spring JDBC tutorial | Spring JDBC
🚀 Want to Master Spring & Java Development?
Subscribe to Ram N Java for beginner-friendly coding tutorials and practical guides!
🔔 Subscribe to YouTube ChannelInserting Data Using SimpleJdbcInsert in Spring JDBC
In standard JDBC and basic JdbcTemplate setups, executing insert statements often requires writing boilerplate SQL strings and mapping parameters manually. SimpleJdbcInsert is a powerful multi-threaded class provided by Spring JDBC that dramatically simplifies insert operations by utilizing database metadata to configure the insert statement automatically.
1. What is SimpleJdbcInsert?
SimpleJdbcInsert is part of the org.springframework.jdbc.core.simple package. It inspects table metadata directly through the JDBC driver, allowing you to execute inserts without manually writing the standard INSERT INTO table_name (...) VALUES (...) SQL statement:
- Metadata Discovery: Reads column definitions and primary key configurations automatically.
- Reduced Boilerplate: Eliminates tedious SQL query strings and placeholder parameter matching.
- Clean Mapping: Accepts key-value pairs using Java
Mapimplementations or bean property holders.
2. How to Configure SimpleJdbcInsert
To set up SimpleJdbcInsert in your Spring DAO or repository layer:
- Initialize with DataSource: Instantiate
SimpleJdbcInsertby passing the configuredDataSourcebean. - Define Table Name: Use the
withTableName("table_name")method to specify your target table. - Specify Columns (Optional): You can optionally restrict operations to specific columns using
usingColumns(...). - Auto-Generated Keys: Use
usingGeneratedKeyColumns("column_name")if your table features auto-increment primary keys.
3. Executing the Insert Operation
Spring provides flexible ways to supply the data being inserted into the database:
- Map-Based Execution: Pass a
Map<String, Object>containing column names as keys and field values as map values directly toexecute(parameters). - MapSqlParameterSource: A Spring utility class that simplifies building parameter maps with fluent chaining methods.
- BeanPropertySqlParameterSource: Automatically maps getter methods on a POJO/domain model directly to matching database table columns.
4. Key Advantages of Using SimpleJdbcInsert
Leveraging SimpleJdbcInsert provides several practical benefits:
- Cleaner DAO Classes: Your data access layer remains readable and free of repetitive SQL strings.
- Fewer Syntax Mistakes: By avoiding manual SQL statement construction, column mismatch and type conversion bugs are minimized.
- Effortless Key Retrieval: Retrieving generated database primary key IDs is handled seamlessly in a single step using
executeAndReturnKey(...).
📺 Explore More Spring JDBC Tutorials
Continue expanding your Java and Spring knowledge with these related tutorials from our channel:
How to format the string using java.util.Formatter class - Playlist

https://www.youtube.com/watch?v=qt89kDYMBGo&list=PLmCsXDGbJHdhKv54h0smpbiNuL9umvbUQ
See also:
Tuesday, 5 March 2019
How to use format(Locale l, String format, Object... args) method of java.util.Formatter class
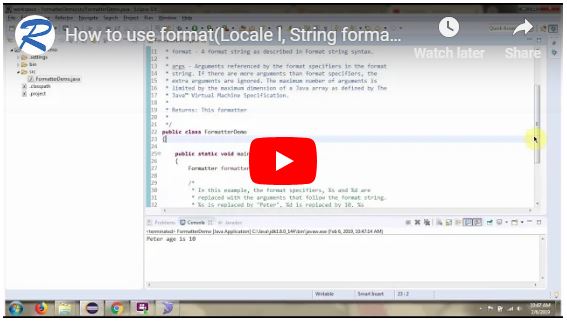
https://www.youtube.com/watch?v=ec2-YfmtPSk&list=UUhwKlOVR041tngjerWxVccw
FormatterDemo.java
import java.util.Formatter;
import java.util.Locale;
/**
* public Formatter format(Locale l, String format, Object... args)
*
* Parameters:
*
* l - The locale to apply during formatting.
*
* format - A format string as described in Format string syntax.
*
* args - Arguments referenced by the format specifiers in the format
* string. If there are more arguments than format specifiers, the
* extra arguments are ignored. The maximum number of arguments is
* limited by the maximum dimension of a Java array as defined by The
* Java™ Virtual Machine Specification.
*
* Returns: This formatter
*
*/
public class FormatterDemo
{
public static void main(String[] args)
{
Formatter formatter = new Formatter();
/*
* In this example, the format specifiers, %s and %d are
* replaced with the arguments that follow the format string.
* %s is replaced by "Peter", %d is replaced by 10. %s
* specifies a string, and %d specifies an integer value. All
* other characters are simply used as-is.
*/
formatter.format(Locale.US, "%s age is %d", "Peter", 10);
System.out.println(formatter.out());
formatter.close();
}
}
import java.util.Locale;
/**
* public Formatter format(Locale l, String format, Object... args)
*
* Parameters:
*
* l - The locale to apply during formatting.
*
* format - A format string as described in Format string syntax.
*
* args - Arguments referenced by the format specifiers in the format
* string. If there are more arguments than format specifiers, the
* extra arguments are ignored. The maximum number of arguments is
* limited by the maximum dimension of a Java array as defined by The
* Java™ Virtual Machine Specification.
*
* Returns: This formatter
*
*/
public class FormatterDemo
{
public static void main(String[] args)
{
Formatter formatter = new Formatter();
/*
* In this example, the format specifiers, %s and %d are
* replaced with the arguments that follow the format string.
* %s is replaced by "Peter", %d is replaced by 10. %s
* specifies a string, and %d specifies an integer value. All
* other characters are simply used as-is.
*/
formatter.format(Locale.US, "%s age is %d", "Peter", 10);
System.out.println(formatter.out());
formatter.close();
}
}
Output:
Click the below link to download the code:
https://sites.google.com/site/javaspringram2019/java_spring_2019/FormatterDemo_format_locale.zip?attredirects=0&d=1
Github Link:
https://github.com/ramram43210/Java_Spring_2019/tree/master/Java_2019/FormatterDemo_format_locale
Bitbucket Link:
https://bitbucket.org/ramram43210/java_spring_2019/src/ef6f73b2185c28cb9cd0149bcd1e9fa0a5b2bdf3/Java_2019/FormatterDemo_format_locale/?at=master
See also:
Subscribe to:
Posts (Atom)